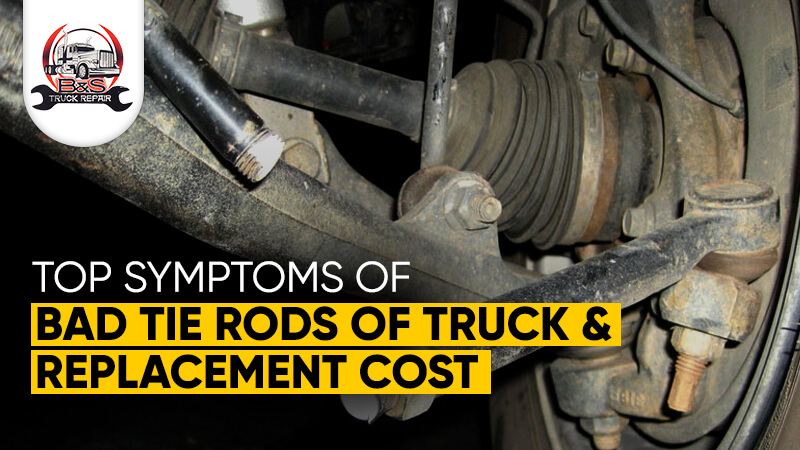
What does it Mean When it Says Service Tire Monitor System?

service tire monitor system

As the world is growing into advancement and having all the technical knowledge. So, human need is also dependent on technological things and gadgets. Similarly, there may be a problem with your tire  monitoring system  if your truck displays the notice Service Tire Monitor System.

Additionally, not heeding this warning could compromise the performance and safety of your truck. Fortunately, you can get immediate assistance for Tire Monitor System issues from mobile tire services and truck tire road service companies nearest tire shop. In this article, we’ll look at what Service Tire Monitor System is and how it can ease things for us.

What is Service Tire Monitor System?

The purpose of a tire monitoring system (Tire Monitor System) is to continuously collect information about the air pressure in your tire. . Furthermore, the device will flash a warning light on your dashboard if it determines that one of your wheels has low tire pressure. These systems are prone to a variety of possible problems, though. Therefore, they are known to develop problems over time.

Additionally, since tire monitoring systems are frequently mounted inside the tire, they could malfunction if you drive over a bad pothole or if the sensors are old. The service tire monitoring system warning light typically indicates that you need to repair problematic system parts in you nearest tire shop so that the system can continue to gather data as intended.

What does Service Tire Monitor System mean?

A service tire pressure monitoring system (Tire Monitor System) monitors your tires’ air pressure pressure. The device will flash a warning light on your dashboard if it believes your tires are under-inflated. But since they may be messed up in so many different ways, these systems are known to start having issues eventually.

Furthermore, most service tire monitoring systems are built into the tires, which could fail if you hit a big pothole or the sensors are too old. So, most of the time, when you see the Service Tire Monitoring System warning light, you must replace parts that aren’t working right so the system can keep gathering data as it should.

What Can Cause Service Tire Monitoring System Warning Light To Come On?

Battery Issues

All in-truck electronics are powered by the battery, which works with the alternator to provide power to all truck accessories constantly, but not the Tire Monitor System. This is because the Tire Monitor System is situated within the rim, and there is no effective way to connect the battery to the system.

This is why a Tire Monitor System sensor usually comes with a small battery, utterly independent of the truck’s main battery. As all batteries tend to discharge over time, the one found within the Tire Monitor System sensor housing will also die eventually. The average lifespan of a Tire Monitor System sensor battery is around 5-6 years.

Deflated tire 

The most frequent cause of the Tire Monitor System indicator turning on is underinflated tires. These devices are made to detect this because most tires gradually lose the ability to maintain correct tire pressure over time. Tire inflation and a restart of the vehicle will quickly cure this. In the same manner, the fault is probably not with your tires if the warning light stays on.

If you have a slow puncture, this may also occur. This is why you should always check your tires for damage whenever this light illuminates.

Faulty Sensors

As mentioned in the beginning, these Tire Monitor System tire sensors are also known to fail occasionally because they are constantly under stress, especially if you often drive on unpaved roads. Because they are situated directly on the inside of the rim, they are susceptible to increased vibrations.

Additionally, this is one of the most common reasons why the service Tire Monitor System light comes on, and it can easily be repaired by simply replacing the sensors. Tire Monitor System sensors should last 5-10 years, depending on how much driving you do.

Stubborn potholes

These sensors continually shake when driving because they are close to the ground. Because you ran over an aggressive pothole, they sometimes misinterpret the data they gather. Moreover, the tire sensor may be tricked into believing that such a powerful disturbance under inflates your tires.

However, restarting the vehicle usually solves this problem. If the problem still exists, it’s possible that the tire sensor has been harmed or that a blunt force contact is causing your tires to lose air.

Road Condition

The proximity of these sensors to the road causes them to be rocked continually when driving. As a result of your encounter with bad road conditions, such as aggressive potholes, they occasionally need to understand the data they are gathering. Such a potential disruption may trick your tires’ tire sensor into falsely believing that they are underinflated.

Typically, restarting the truck or trailer will fix this problem. Suppose the problem still exists; the tire sensor may have been broken, or your tires may lose air due to a direct blow.

How to Fix Service Tire Monitor System?

The best way to reset the Tire Monitor System light and service tire monitor system warning is to put your tire pressure to the recommended range, drive as usual for a while, switch the truck off, then turn it back on. After doing this, if the GM service tire monitor system warning remains on or is joined by a flashing Tire Monitor System light. It should not be attempted to be reset at home; instead, it needs to be professionally diagnosed and serviced at a Chevy-authorized service facility.

New tires must be installed in some cases, while sensors need to be changed in others. Even more serious electrical problems may occasionally bring it on. Moreover, trained professionals will still need to diagnose and fix it. It’s not a major problem, but getting it fixed as soon as you can is essential to maintaining the health of your vehicle.

What Does Service Tire Mobility Kit Mean?

The service tire mobility kit is defined as a tire repair kit or tire sealant kit, an innovative automotive product designed to cater to all the challenges of roadside emergencies caused by flat tires. In recent years, this compact and mobile kit has gained popularity as an alternative to traditional spare tires. Moreover, in the technical world, it is helping drivers with a convenient and effective way to deal with punctured or service truck tires on the go. 

If you get a flat, attach the inflator-kit hose to the tire’s valve stem. Then, turn on the unit and let it inject the sealant into the tire. Then you use the kit’s compressor to inflate the flat.

You don’t have to remove the tire, so using the kit doesn’t require the physical strength that changing a tire does. On the other hand, the kit doesn’t work if the puncture is larger than the size of a pencil eraser or is located on the sidewall. It will also do you no good if the tire is separated from the wheel.

What Does a Service Mobility Kit have?

  1. A jack capable of lifting the vehicle.
  2. A cross brace
  3. Two road signs
  4. A first-aid kit
  5. A fire extinguisher
  6. Two blocks to block the vehicle.
  7. Basic toolbox
  8. Spare tire
  9. Flashlight
  10. Prevention signs: in an equilateral triangle of at least 30 centimeters on each side, with red borders of at least five centimeters wide, in reflective material, with brackets to place them vertically.
  11. Fire extinguisher: with the minimum extinguishing capacities. 2B-C for cars, vans, and pickup trucks.
  12. First aid kit: it is recommended to have current antiseptics, a cutting element, cotton, sterile gauze, adhesive bandages, elastic bandage, analgesics, and soap.

How is the Tire Mobility Kit Serviced?

The service tire mobility kit sealant has an expiration date, which is why the warning light is on. It tells you to change the sealant to have it available when you need it. Your local Ford dealer can sell you a replacement if you remove the can and look up the part number. You can replace your kit after exchanging it so they can be used again.

Resetting the warning light is the last step. When you reach the option to reset the service tire mobility kit, scroll through the menu. Based on the new can of sealant’s expiration, choose when you want the warning light to alert you. When you exit the menu, you ought to be good to go. 

The emergency tool kit in the spare tire trunk is known as a service tire mobility kit. The roadside kit, as defined by law by the National Highway Traffic Safety Administration, is made up of many objects that are used to notify other drivers of an unusual condition on the road, such as a broken-down car, an accident, or a flat tire, among others. On the other hand, it also considers a few tools that, if needed, you may use to carry out simple repairs.

How to Reset Service Tire Monitor System?

Resetting the tire pressure indicator is the simplest way to fix your truck’s service monitor system. There are two ways to reset the system when the sensors occasionally need further assistance.

Driving for 10 minutes at highway speeds is the first step toward resetting tire pressure monitoring systems. The tire pressure warning light is supposed to go off when you start the truck again or after your current drive.

If the approach described above is unsuccessful, try to reset the Tire Monitor System light using the following steps.

Step 1: Switch on the ignition without running the engine.

Step 2: Locate the Tire Monitor System button, then press and hold it until your alert flashes/goes away.

Step 3: Drive for a while, stop, and start the truck again. Your monitor system is now fixed!

If the above methods don’t work, take your Tire Monitor System-equipped vehicle to a B&S truck repair shop and let the professionals handle the job.

What Should I Do When The Light Is On?

You could do a couple of things to resolve the issue. They include:

  • Check the tire pressure. If the pressure isn’t proper, you should quickly inflate the tire. But if it doesn’t resolve the issue, the problem lies within the system.
  • Check the sensors themselves for cracks or other damage. If damaged, they need to be replaced before driving on them again.
  • Call a mechanic if something other than those solutions works with mobile tire services. They’ll know what else might be causing this problem and will be able to help resolve it for good.

However, if none of the above works, the only way is to reset the Tire Monitor System system.

Get The Perfect Tires For Your Truck Today!

tires

Can I drive with the Light on my Tire Monitor System?

If you thoroughly examine your tires, you can continue to drive even while your Tire Monitor System light is on. You can still operate the vehicle even with this light on because several air pressure-unrelated factors frequently cause these systems to malfunction. Furthermore, if you do this, you should continuously check the pressure in your tires.

However, if your tire is under-inflated, you should only drive if necessary. You should search for a truck tire road service near me. It is possible for a tire to develop a slow puncture that releases air gradually occasionally, but this does not guarantee the tire’s safety.

Final words 

As soon as the “Service Tire Monitor System” warning appears, take action to ensure proper tire pressure. Moreover, maintain the performance and safety of your truck. By bringing tire help to you, mobile tire services and truck tire road service companies give practical answers. Depending on these services, you may have your Tire Monitor System issues quickly and expertly resolved, allowing you to drive again confidently.

Repair Your Semi-Truck Tires with bstruckrepair professionals

repair your semi-truck tires

At B&S Truck Repair, we know that your truck is your livelihood. You travel hundreds of miles in your truck to have cash flow. Suppose anything happens to your truck while making a delivery. It can put you in the wrong spot. Well, with us you don’t have to worry about anything. We have some of the best technicians in the states at your service. Before going on any trip, remember to give us a call. Our technician will make a thorough examination of the vehicle to make sure that you are good to go. They will check your automobile’s tires and see if there is any problem. Our professionals will repair your semi-truck tires in no time. Moreover, from tire repair & replacement to complete computer diagnostic technology, repairs, and inspection. Our certified professionals will ensure that your truck is in a topnotch condition and you are back in the game in no time.

Is there a semi-truck tire repair near me?

B&S Truck Repair is always near you. We are facilitating our loyal customers with various exciting services like:

  • We are always ready for an urgent emergency call.
  • Afterward, we have years of experience in vehicle and semi-truck tire repair services.
  • Moreover, with the best truck, there is no hidden cost, and all prices are fixed.
  • Furthermore, our customer support service is highly amicable and always available.

Get in touch with the B&S Truck Repair shop in town.

Every heavy-duty vehicle driver knows the worth of properly functioning tires. Suppose there is a tiny bit issue in any tire of your truck. The results can be disastrous, not only for you but also for the vehicle close to you. So whenever going for a long and challenging trip, always ensure that your semi-truck tires are in the excellent shop, and if there is a problem, you can contact us. We are experts in repairing semi-truck tires if the tire is busted and you want a new one. We also have a truck tire shop with high-grade and exceptional tires for your semi-truck. Contact B&S Truck Repair for the best semi-truck tire solutions.

Semi Truck Tire Sizes

With everything going in a hassle and transporting goods here and there. Truck tire sizes play an essential role in maintaining these heavy-duty vehicles’ performance, effectiveness, and safety. Dump tires are made to resist the heavy loads and strenuous requirements of long-distance transportation.

Commercial Truck Tire Sizes 

Commercial truck tire sizes are created expressly to fulfill the needs of heavy-duty trucks employed in a variety of sectors, including planning, construction, and transportation. B&S truck  tire sizes have been carefully chosen to offer the best performance, carrying capacity, toughness, and safety. Typical tire sizes for commercial trucks include:

  • 295/75R22.5: This tire size is widely used for small and long-haul applications. It has a width of 295 millimeters, a sidewall height that is 75% of the width and fits a 22.5-inch rim diameter. It gives a good balance of load-carrying capacity, fuel efficiency, and traction.
  • 11R22.5: Another popular tire size for semi-trucks, the 11R22.5 is often used in small areas and long-haul operations. It has a width of 11 inches, a sidewall height that is approximately 75% of the width and fits a 22.5-inch rim diameter. It provides clients based on their favorite stability, durability, and traction.
  • 285/75R24.5: This tire size is commonly found on larger vehicles and some regional haul trucks. It has a width of 285 millimeters, a sidewall height that is 75% of the width and fits a 24.5-inch rim diameter. It offers heavy load-carrying capacity and traction while providing a smoother ride.
  • 315/80R22.5: This tire size is often used in heavy-duty applications and trucks requiring higher load-carrying capacity. It has a width of 315 millimeters, a sidewall height that is 80% of the width and fits a 22.5-inch rim diameter. It provides exceptional stability, durability, and traction for demanding operations.

Dump Truck Tire Sizes

Due to their versatile applications, B&S truck repair has commercial trucks, a specialized type of commercial truck, which also needs tire sizes. Dump truck tire sizes may be different based on the truck’s size and capacity. The terrain it travels over, and the purpose for which it is being used. Typically, the tires of dump trucks are manufactured to offer outstanding grip, durability, and resistance to cuts and punctures.

  • 11R24.5: Medium- and heavy-duty dump trucks often utilize tires with a diameter of 11R24.5. It has a 24.5-inch rim diameter, has a sidewall height of around 75% of the width, and is 11 inches wide. It offers high traction and load-carrying capabilities for various dump truck applications.
  • 12.00R24: This tire size is commonly used on larger, heavy-duty dump trucks operating in rugged terrain. It has a width of 12 inches and fits a 24-inch rim diameter. It provides exceptional load-carrying capacity and off-road traction, making it suitable for demanding construction and mining applications.

When you are on a longer or shorter road trip, choosing the appropriate tire sizes for commercial trucks, including semi-trucks and dump trucks, is essential for optimal performance, safety, and efficiency. Size is always not the game, but semi-truck tires need to be properly maintained and regularly inspected to ensure optimal performance and road safety. This includes preserving the recommended tire pressure, inspecting the tires for wear or damage, and rotating the tires as needed. This is because you are not struck in the middle of an important journey. Truck owners may maximize the life and dependability of their tires by choosing the right tire size and following sound maintenance procedures, eventually improving the efficiency and profitability of their fleet.

Get The Perfect Tires For Your Truck Today!

tires

Facilitating you with the best Semi tire repair services

Making hundreds of trips in a year can take a toll on your semi-truck tires. If they aren’t properly checked, the tires can bust during a shipment, and you will be stranded in the wildernesses of the highway. However, in this desperate situation, we will be there for you. With a simple click, we will be there to save your day. Our certified professionals and exceptional semi-tire repair capabilities will put you back on track in no time.

Moreover, we have the most advanced workshop for your semi-truck tires repairment and MTO-approved certification. With the B&S Truck Repair, nothing goes wrong. Get in touch now.

Our semi-truck services

B&S Truck Repair provides numerous truck maintaining and repairing services. Some of the primary key features are:

  1. With us, you can rebuild your truck engine.
  2. Brand new equipment for truck alignment and truck brakes, drums services.
  3. Moreover, excellent truck air condition repair and any semi-truck electrical work. You name it. We can make it.
  4. Furthermore, you can even contact us for truck towing, oil change, truck transmission, and fleet maintenance. The list goes on and on. However, these are some of the main capabilities of our organization. to get a good overview. You can contact us or even surf our website.
  5. In addition, for the best semi-truck tire repair services, you can contact the B&S Truck Repair anytime. We are always near you.

Affordable Used Tire Places: Find Quality and Savings Today

b&s truck tire shop

A crucial component of being a responsible automobile owner is maintaining your vehicle. In addition to it, every component needs maintenance, from frequent oil changes to brake inspections, to guarantee performance and safety. Moreover, the state of the tires is one area of car maintenance that needs to be considered. Despite this, worn-out or broken tires can make driving less safe and reduce fuel efficiency. 

New tire purchases, however, can be pricey. That’s when reasonably priced used tire places near me come into play. With a focus on B & S Truck Repair, a reputable used tire store in Fort Worth, Texas. This article will examine the advantages of obtaining quality and savings at used tire establishments.

The Importance of Quality Tires:

Before delving into the world of used tires, it’s crucial to understand why tire quality matters. To move on, tires are the only contact point between your vehicle and the road, affecting your vehicle’s performance, handling, and safety. Moreover, worn-out or damaged tires can compromise your vehicle’s ability to grip the road, leading to decreased control, longer stopping distances, and an increased risk of accidents. Additionally, poorly maintained tires can also negatively impact fuel efficiency, costing you more money in the long run.

The Advantages of Buying Used Tires:

2.1 Cost-Effectiveness:

The cost-effectiveness of choosing used tires is one of their main benefits. As opposed to purchasing new tires, used tire shops have a wide selection of economical options that can help you save money. Used tires offer a cost-effective solution, whether on a tight budget or just trying to reduce vehicle maintenance costs.

2.2 Quality Assurance:

Contrary to popular belief, not all secondhand tires are in bad shape. Furthermore, reputable used tire shops perform in-depth inspections and only stock high-calibre tires that satisfy safety requirements. The tread depth, general condition, and potential problems are all meticulously inspected on these tires. Lastly, you can get dependable tires that provide the best performance and safety by shopping at a reputable used tire store.

Finding Used Tire Places Near You:

When searching for used tires near my location, finding a reputable company that offers quality products and reliable services is essential. For this, B & S Truck Repair, located in Fort Worth, Texas, is a well-established used tire shop. Conversely, it is known for its commitment to customer satisfaction and exceptional tire selection.

3.1 B & S Truck Repair: A Reliable Used Tire Shop:

High-quality used tires are B & S Truck Repair’s area of expertise to satisfy the various demands of their clients. They provide many tire brands and sizes to ensure you can obtain the ideal fit for your car. Moreover, B & S Truck Repair promises top-notch products that are rigorously checked for quality and safety thanks to their wealth of industry knowledge.

How to Find Cheap Used Tires Near You:

It might be easy to locate inexpensive secondhand tires close to where you are. You have a few options for finding cheap used tire stores near me besides B & S Truck Repair.

4.1 Online Search:

If you know where to look, you may easily find affordable secondhand tires close to where you are. You can use a number of techniques to locate cheap used tire shops close to me in addition to B & S Truck Repair.

4.2 Local Classifieds and social media:

Watch local classifieds in publications like newspapers or internet directories to identify people or companies selling secondhand tires. Furthermore, you may also use community forums or social media sites like Facebook Marketplace to find inexpensive used tires in your area. Despite this, you can ask questions about the tires’ condition and quality on these platforms because they frequently offer direct contact options with sellers.

4.3 Recommendations and Referrals:

You can find trustworthy and reasonable used tire shops by asking friends, relatives, or auto enthusiasts for advice. Ask those in your network who have recently bought used tires about their experience. They can offer insightful advice and recommend trustworthy stores in your neighbourhood.

Benefits of Choosing B & S Truck Repair:

Fort Worth, B & S Truck Repair stands out for several reasons when finding quality used tires.

5.1 Extensive Selection:

B & S Truck Repair offers a wide selection of used tires, catering to various vehicle types, sizes, and brands. Their extensive inventory ensures you can find the perfect fit for your vehicle requirements.

5.2 Quality Assurance:

At B & S Truck Repair, quality is of utmost importance. Every used tire undergoes a thorough inspection to ensure it meets its stringent standards for safety and performance. By choosing B & S Truck Repair, you can have peace of mind knowing that you’re purchasing reliable and high-quality tires.

5.3 Competitive Pricing:

Affordability is a crucial aspect of B & S Truck Repair’s service. Moreover, they strive to offer competitive prices on their used tires, allowing you to find quality products without breaking the bank. Their commitment to affordable options makes them a preferred choice for cost-conscious customers.

5.4 Expert Assistance:

The knowledgeable and friendly staff at B & S Truck Repair are always ready to assist you in finding the right used tires for your vehicle. Moreover, whether you have specific requirements or need guidance in making a decision, their team will provide personalized recommendations to ensure you make an informed choice.

Get The Perfect Tires For Your Truck Today!

tires

Ending Words!

Regarding vehicle maintenance, finding affordable used tire places near me can help you save money without compromising quality and safety. In addition, B & S Truck Repair, a reputable used tire shop in Fort Worth, Texas, offers a wide range of high-quality used tires to meet your specific needs. 

By opting for used tires, you can enjoy significant cost savings while ensuring optimal road performance and safety. Moreover, whether you search online, explore local classifieds, or rely on recommendations, finding cheap used tires near me is open now. So, take advantage of the benefits of affordable used tire places and discover quality and savings for your vehicle today.

Top 13 Must-Have Items on a Truck Inspection Checklist

Truck Inspection Checklist

Truck inspection is a critical process that ensures the safety of drivers, passengers, and other road users. It is essential to inspect trucks regularly to prevent accidents and breakdowns caused by mechanical failures. 

This blog aims to provide a comprehensive truck inspection checklist that truck drivers can use to ensure that their vehicles are roadworthy.

Truck Inspection Checklist Overview:

  • Pre-Trip Inspection

The pre-trip inspection is the first step in ensuring that your truck is safe to drive. It involves checking various parts of the truck, including the exterior, interior, and engine compartment. Here are the critical components to check during a pre-trip inspection:

  • Exterior Inspection

The first thing to check during the exterior inspection is the tires. Ensure that they are properly inflated and have sufficient tread depth. Check for any cuts, punctures, or bulges on the sidewalls. Inspect the rims for cracks or other signs of damage.

In the truck electric inspection check the lights, including the headlights, taillights, turn signals, and brake lights. Ensure that they are all working correctly. Test the horn to make sure it is loud enough to be heard from a distance.

Inspect the windshield and other windows for cracks or chips. Make sure that the windshield wipers are working correctly and that the blades are in good condition.

  • Interior Inspection

The next step is to inspect the interior of the truck. Check the seat belts to ensure that they are working correctly and are not frayed or damaged. Test the emergency brakes to ensure that they are operational.

Check the mirrors, including the side mirrors and the rearview mirror. Ensure that they are adjusted correctly and that they are clean and free from cracks or other damage.

  • Engine Compartment Inspection

The final step in the pre-trip inspection is to inspect the engine compartment. Check the fluid levels, including the oil, coolant, and windshield washer fluid. Look for any leaks under the hood and around the engine.

Inspect the belts and hoses for signs of wear or damage. Check the battery terminals to ensure that they are clean and tight. Make sure that the air filter is clean and in good condition.

  • On-The-Road Inspection

Once you have completed the pre-trip inspection, the next step is to conduct an on-the-road inspection. This involves checking various components of the truck while driving. Here are the critical components to check during an on-the-road inspection:

  • Brakes

The brakes are the most critical component of the truck. Ensure that they are working correctly by testing them while driving. Check for any signs of brake fade or reduced braking power. If you notice any issues with the brakes, pull over and have them checked immediately or find a truck brake repair mechanic immediately.

  • Steering and Suspension

The steering and suspension are essential components that ensure the truck’s stability and handling. Test the steering and suspension while driving, looking for any signs of looseness or play. If you notice any issues with the steering or suspension, have them checked immediately.

  • Transmission

The transmission is responsible for transferring power from the engine to the wheels. Test the transmission by shifting gears while driving. Look for any signs of slipping or grinding. If you notice any issues with the transmission, have it checked immediately.

  • Post-Trip Inspection

The post-trip inspection is the final step in ensuring that your truck is safe to drive. It involves checking various components of the truck after completing a trip. Here are the critical components to check during a post-trip inspection:

  •  Inspect the Rims

Check the tires for any signs of wear or damage. Inspect the rims for any cracks or other signs of damage. Look for any signs of leaks or damage to the undercarriage.

  •  Check for Seatbelts

Check the seat belts for any signs of wear or damage. Test the emergency brakes to ensure that they are operational. Inspect the mirrors to ensure that they are clean and free from cracks or other damage.

  •  Compartment Inspection

Check the fluid levels, including the oil, coolant, and windshield washer fluid. Look for any signs of leaks under the hood and around the engine. Inspect the belts and hoses for signs of wear or damage. Check the battery terminals to ensure that they are clean and tight.

  •  Documentation

It is essential to maintain proper documentation of truck inspections. Keep a record of all inspections, including the date, time, and location of the inspection. Include details of any issues that were identified during the inspection and how they were resolved.

Choose Best Truck Repair Shop For Your Truck Today!

truck repair

Final Words!

Truck inspection is a crucial process that ensures the safety of drivers, passengers, and other road users. It is essential to inspect trucks regularly to prevent accidents and breakdowns caused by mechanical failures. 

This blog has provided a comprehensive truck inspection checklist that truck drivers can use to ensure that their vehicles are roadworthy. By following this checklist, truck drivers can ensure that their vehicles are safe to drive and help prevent accidents on the road.

How to Remove Broken Exhaust Flange Bolts: A Step-by-Step Guide

broken exhaust bolts repair

Dealing with damaged exhaust flange bolts might be a hassle, but do not worry! We at B & S Truck Repair are aware of your frustration and wish to assist you in solving this issue with little difficulty. To save you time and effort, we’ll take you through removing damaged exhaust flange bolts in this step-by-step manual. Let’s get going!

Step 1: Collect the Required Equipment and Materials

Before starting the repair process, you must have everything necessary to avoid delays or potential safety hazards. Some tools you’ll need include a socket wrench, a breaker bar, penetrating oil, a drill, drill bits, an extractor set, a hammer, and a flathead screwdriver. These tools are essential for drilling and extracting the broken bolt from the flange.

In addition to tools, you’ll also need replacement bolts and gaskets. It’s essential to have the correct size and type of bolts and gaskets for your vehicle make and model. Using the wrong size or type of bolts or gaskets can cause leaks and potentially damage your vehicle’s engine. At B & S Truck Repair, we understand the importance of using the correct replacement bolts and gaskets for your car. Our experienced technicians can assist you in sourcing the right size and type of bolts and gaskets specific to your truck’s make and model. Before purchasing replacement bolts and gaskets, consult your vehicle’s manual or a trusted mechanic to ensure you have the right parts. By gathering all the necessary tools and materials, you’ll have everything you need to successfully remove the broken exhaust flange bolt and repair your vehicle’s exhaust system with the help of an exhaust flange repair kit clamp.

Step 2: Remove the Exhaust Manifold

Step 2 of removing the broken exhaust flange gasket is to remove the exhaust manifold. This step is necessary to access the fractured bolt and begin the repair process. Before starting, it’s essential to disconnect the battery to prevent any electrical hazards. Once the storm is disconnected, use a socket wrench and breaker bar to remove the bolts securing the manifold to the engine block. These bolts are often rusted and difficult to remove, so it may be helpful to use penetrating oil to loosen them. Once the bolts are removed, carefully remove the manifold and set it aside.

Step 3: Apply Penetrating Oil

Step 3 of removing broken exhaust flange bolts is to apply penetrating oil to the broken bolt. Penetrating oil is a lubricant that can help loosen rusted or stuck bolts, making them easier to remove. It’s essential to apply the penetrating oil and allow it to soak for at least an hour before attempting to remove the broken bolt. This will help the oil penetrate and loosen any rust or debris causing the bolt to stick.

When applying penetrating oil, it’s essential to use a sufficient amount to ensure it reaches the entire bolt. If the bolt is exceptionally rusted or stuck, applying multiple coats of penetrating oil over several hours or even overnight may be helpful. By using penetrating oil, you’ll make removing the broken exhaust flange bolt much more accessible and reduce the risk of damaging other parts of your vehicle.

Step 4: Drill a Hole in the Bolt

Step 4 of removing broken exhaust flange bolts is to drill a hole in the bolt. This step is necessary to create a guide for the extractor and to help loosen the bolt from the flange. When preparing a hole, choosing a drill bit slightly smaller than the extractor you’ll use is essential. This will ensure that the extractor can grip and remove the bolt from the flange.

When drilling a hole, use a center punch to create a starting point and prevent the drill bit from slipping and shooting straight and slowly to avoid damaging your vehicle’s flange or other parts. Once the hole is drilled, use a flathead screwdriver to break rust or debris around the bolt. This will make it easier for the extractor to grip the bolt and remove it from the flange. Drilling a hole in the broken exhaust pipe flange gasket will create a guide for the extractor and reduce the risk of damaging other parts of your vehicle. B & S Truck Repair has a wide range of high-quality extractors and drill bits available. With our expertise and reliable tools, we can help you effectively remove the broken bolt and get your truck back on the road in no time.

Step 5: Use an Extractor Set

Using an extractor set, remove the fractured exhaust flange bolts in step 5. A specialized tool called an extractor set is used to grasp and remove damaged bolts from the flange. To utilize the extractor set, place it into the bolt’s hole and spin it counterclockwise using a socket or wrench. The bolt will be twisted out of the flange while being held by the extractor.

Selecting the proper size and kind of extractor is crucial when utilizing an extractor set. Choose an extractor that fits the damaged bolt and flange since they come in various sizes and forms. To protect the flange and other components of the car, it’s vital to be cautious while spinning the extractor. Applying additional penetrating oil or using a different-sized extractor may be beneficial if the extractor cannot grasp the bolt. Using an extractor set, you may effectively remove the damaged exhaust flange bolt and fix your car’s exhaust system.

Step 6: Use a Hammer and Flathead Screwdriver

Step 6 involves using a hammer and flathead screwdriver to remove damaged exhaust split flange fasteners. This step may assist in releasing the bolt from the flange if the extractor set cannot do so. Place the flathead screwdriver against the bolt and give it a little tap with a hammer to employ this technique. This will assist in removing any rust or debris obstructing the bolt’s rotation.

It’s essential to exercise care and prevent striking the flange or other components of your vehicle while using a hammer and flathead screwdriver. Be careful to tap lightly and with little force. After tapping the bolt, if it still doesn’t turn, try adding additional penetrating oil or trying an alternative removal technique. Using a hammer and flathead screwdriver, you may effectively loosen and remove the damaged bolt from the flange.

Step 7: Clean and Replace the Flange

After removing the damaged bolt, carefully clean the flange with a wire brush and solvent. Tighten the replacement bolt and gasket to the manufacturer’s recommendations after installation.

After properly removing the broken bolt, B & S Truck Repair can ensure that the flange will be thoroughly cleaned using high-grade wire brushes and solvents, leaving it free of dirt and contaminants. Our knowledgeable specialists may also carefully install the new gasket and bolt and tighten it to the manufacturer’s specifications to guarantee a precise and secure fit for optimal performance. You may count on us to take care of these crucial procedures precisely and thoroughly.

Choose Best Truck Repair Shop For Your Truck Today!

truck repair

Bottom Line

We hope this article has given you the information and confidence you need to fix those damaged exhaust flange bolts. Now, let me pose a challenging question: What additional difficulties have you encountered while fixing vehicles, and how did you resolve them? Please share your thoughts and experiences in the comments section. Remember that B & S Truck Repair will always help you with your automotive undertakings.

Low Engine Oil Pressure Causes: Normal Range & How to Fix

high oil pressure

Low engine oil pressures refers to a situation where the oil pressure in an engine’s lubrication system is below the minimum level required for the proper functioning of the engine. The oil pressure is critical to the health of the engine because it provides lubrication and cooling to its moving parts, which helps to prevent excessive wear, overheating, and damage.

Low oil pressure can be caused by a variety of factors, including low oil level, a malfunctioning oil pump, a clogged oil filter, or worn engine bearings. If left unaddressed, low oil pressure can lead to serious engine damage or even engine failure.

What are the Causes of Low Engine Oil Pressure?

There can be several causes of low engine oil pressures, some of the most common ones are:

1. Low oil level

If there is not enough oil in the engine, it can cause a drop in oil pressure.

2. Worn engine bearings

The bearings in the engine that support the crankshaft and connecting rods can wear down over time, causing a drop in oil pressure.

3. Faulty oil pump

The oil pump is responsible for circulating oil throughout the engine. A malfunctioning oil pump can cause low oil pressure.

4. Clogged oil filter

An oil filter that is clogged with dirt and debris can restrict the flow of oil through the engine, leading to low oil pressure.

5. Leaking oil pressure sensor

The oil pressure sensor detects the pressure of the oil in the engine and sends a signal to the gauge on the dashboard. If the sensor is leaking, it can cause inaccurate readings and possibly low oil pressure.

6. Thin or contaminated oil

If the oil in the engine is too thin or contaminated with dirt, it may not be able to provide enough lubrication to the engine, leading to low oil pressure.

7. Faulty pressure relief valve

The pressure relief valve is responsible for regulating oil pressure in the engine. A faulty valve can cause low oil pressure.

The Normal Range of Low Oil Engine Pressure

The normal range of oil pressure in an engine can vary depending on the make and model of the vehicle. However, typically, the oil pressure at idle should be around 10 PSI (pounds per square inch) or higher, while the oil pressure at higher RPMs (revolutions per minute) should be around 30-60 PSI.

If the oil pressure is below the minimum recommended pressure for the engine, it is considered low oil pressure. It’s important to keep in mind that the normal range of oil pressure can vary depending on factors such as engine temperature, oil viscosity, and engine wear. It’s always best to refer to the owner’s manual or consult a qualified mechanic to determine the appropriate oil pressure range for your specific vehicle.

Symptoms of Low Oil Engine Pressure

When an engine experiences low oil pressure, there are several symptoms that can indicate a problem. Here are some of the most common symptoms of low engine oil pressures:

1. Warning Light

The oil pressure warning light on the dashboard will illuminate to indicate low oil pressure.

2. Engine Noise

Low oil pressure can cause a knocking or ticking sound in the engine, which may increase in intensity as the engine RPMs increase.

3. Poor Performance

The engine may not perform as well as it should, with reduced acceleration, power, and fuel efficiency.

4. Overheating

Low oil pressure can cause the engine to overheat, as the oil helps to regulate the engine temperature.

5. Oil Leaks

Low oil pressure can cause oil to leak from the engine, which can be detected by oil stains or puddles under the vehicle.

Choose Best Engine Repair Shop For Your Truck Today!

truck repair

How to Fix Low Engine Oil Pressure?

Fixing low engine oil pressure requires identifying and addressing the underlying cause. In this case, you can schedule your engine oil replacement from B&S Truck Repair.

Here are some steps you can take to fix low engine oil pressure:

  1. Check the oil level: If the oil level is low, adding more oil can help restore normal oil pressure. Be sure to use the recommended oil type and viscosity for your vehicle.
  2. Change the oil: If the oil is dirty or contaminated, changing it can help restore normal oil pressure.
  3. Replace the oil filter: A clogged oil filter can restrict oil flow and cause low oil pressure. Replacing the filter can help fix the issue.
  4. Replace the oil pressure sensor: If the sensor is faulty or leaking, it can cause inaccurate readings and low oil pressure. Replacing the sensor can help fix the problem.
  5. Replace the oil pump: If the oil pump is malfunctioning or damaged, it may need to be replaced to restore normal oil pressure.
  6. Replace worn engine bearings: If worn engine bearings are causing low oil pressure, they may need to be replaced to fix the issue.

FAQs

Question: How to Fix Low Engine Oil Pressure?

Answer: Identify and fix the root cause of the low oil pressure, which may include replacing a faulty oil pump, oil filter, or oil pressure sensor, or repairing engine damage.

Question: What is Normal Oil Pressure in a Truck?

Answer: Normal oil pressure in a truck typically ranges from 30 to 60 PSI.

Question: What Should my Oil Pressure be?

Answer: Oil pressure depends on the make and model of the vehicle, but typically ranges from 20 to 60 PSI while idling, and increases to 40-80 PSI while driving.

Check Engine Light Went Off After a Week By Itself Automatically

Check Engine Light Went Off

The dreaded check engine light went off after a week is one of the most irritating things that can occur to a driver. It can come on suddenly, without warning, and leave you wondering what is wrong with your car. But what happens if the light turns off on its own? Is it safe to assume everything is OK with your vehicle, or should you still be concerned? This blog post will explore whether check engine lights ever turn off themselves and what it means for your car.

Causes of Engine Light Comes On

Some of the common causes of the engine light coming on include:

  • Loose or Damaged Gas Cap:

A broken or loose gas cap can initiate the engine light to come on. This is because a gas cap is designed to maintain the pressure within the fuel tank. If it is not working perfectly, it can lead to fuel evaporating from the tank, causing a drop in fuel efficiency and increasing emissions.

  • Failed Catalytic Converter:

The catalytic converter is accountable for converting damaging exhaust gases into less harmful ones before they are released into the atmosphere. If the catalytic converter fails, the engine light may come on, and the vehicle may experience decreased performance and increased emissions.

What is the First Thing to Check When the Check Engine Light Comes on?

The first thing you should do when the check engine light comes on is to check your vehicle’s owner’s manual for information on the light’s meaning and recommended action. If your vehicle is still running normally and there are no other noticeable symptoms, you may be able to continue driving until you can diagnose and repair the problem. However, suppose the light is flashing, or there are other signs of a serious problem, such as reduced power or strange noise. In that case, you should pull over and seek professional assistance immediately.

Why does it Mean When Your Check Engine Light Comes on and then it Goes Off by Itself?

When your check engine light (CEL) comes on, your vehicle’s onboard diagnostic system (OBD-II) has detected a problem with one of the components or systems it monitors. 

If the light goes off by itself, it typically means that the problem has been resolved or has temporarily corrected itself. There could still be an underlying issue that needs to be addressed.

Your vehicle’s OBD-II system should be checked by a qualified mechanic as soon as possible after the light comes on, even if it goes off. This will help to identify and address any underlying issues before they become more severe or costly problems.

Understanding the Check Engine Light Went Off after a Week

The check engine light is an indicator on your car’s dashboard that warns you of potential engine problems. The light may come on for various reasons, such as a faulty oxygen sensor, a loose gas cap, a bad spark plug, or a damaged catalytic converter. The OBD-II system monitors and controls your car’s performance and emissions, and when it detects a problem, it triggers the check engine light.

Should You Ignore the Check Engine Light if it Turns Off?

If your check engine light went off after a week, it doesn’t necessarily mean the problem is fixed. The light may turn off temporarily, but it could come back on again if the underlying issue is not resolved. 

There are several reasons why your check engine light may turn off by itself. One of the most common reasons is that the problem was temporary and has resolved itself. For example, tightening the gas cap may resolve the issue, and the light may turn off if the gas cap is loose.

Another reason the check engine light may turn off is that there may have been a glitch in the system. The OBD-II system is complex, sometimes producing false readings or errors. In such cases, the light may turn off on its own, even if there is no problem with your car.

What Would You Do If the Check Engine Light Turns Off?

If your check engine light turns off, you should first check the owner’s manual to see if there are any recommended steps to take. 

If there are no directions in the manual, the next step is to take your car to a mechanic. The mechanic can perform a diagnostic scan to check for any stored codes in the system. If there are no stored codes, the mechanic may perform a test drive to ensure that the problem has been resolved.

Choose Best Engine Repair Shop For Your Truck Today!

truck repair

The mechanic may reset the check engine light if the problem is temporary and resolved. However, if the problem persists, the mechanic must diagnose it and take the necessary steps to fix it.

Conclusion

In conclusion, while check engine light went off after a week, it is not shared. The check engine light is a crucial component of a vehicle’s onboard diagnostics system, indicating that there might be an problem with the engine or emissions system. If the light turns on, it is recommended to have the automobile inspected by a qualified mechanic as soon as possible to identify and address any potential problems. Ignoring the light may lead to more severe and expensive trials. While the light can turn off on its own, it is not recommended to rely on this happening as a solution to the underlying issue. 

FAQs

  • What does it mean when your check engine light comes on and then goes off?

It typically means that there was a temporary issue with your vehicle’s systems that resolved itself or was resolved by the vehicle’s computer. However, it’s still essential to have the issue diagnosed by a mechanic to ensure no underlying problems.

  • Is it OK to drive with the check engine light on?

It is not recommended to drive with the check engine light on, as it indicates an issue with your vehicle’s systems that could cause further damage or lead to a breakdown.

  • Can low oil cause the check engine light to come on?

Low oil levels can cause the check engine light to come on. The engine’s oil pressure sensor detects a decrease in oil pressure and triggers the morning to warn the driver that there may be an issue with the engine’s lubrication system.

Check Engine Light Alert Indicators of a Loose Gas Cap

check engine light gas cap

The check engine light (CEL) is a warning light on the dashboard that illuminates when there is an issue with the vehicle’s engine or emission control system. This may seem minor but can cause more significant problems if not addressed. In this blog post, we’ll discuss the indicators of a loose gas cap that triggers the CEL and what you can do to prevent this issue from happening.

What is Gas Cap?

A gas cap, also known as a fuel cap, is a removable component that covers the opening of the fuel tank on a vehicle. It is designed to prevent gasoline vapors from escaping into the atmosphere and prevent debris and other foreign objects from entering the fuel tank. Gas caps typically screw or snap onto the fuel filler neck and may have a rope or chain to keep them attached to the vehicle when removed. Some gas caps also include a built-in pressure relief valve that allows air to enter the tank to replace the fuel as it is used, helping to maintain consistent pressure in the fuel system.

Symptoms of Bad Gas Cap

A wrong or faulty gas cap can cause various symptoms in your vehicle. Here are some of the most familiar signs that may reveal a problem with your gas cap:

  1. Check Engine Light: A check engine illumination is the most common symptom of a bad gas cap. A faulty gas cap can cause the evaporative emissions system to detect a leak, which triggers the check engine light.
  2. Gasoline Smell: A loose gas cap can cause gasoline fumes to leak out of the fuel system, leading to a strong gasoline smell inside and outside the vehicle.
  3. Reduced Fuel Efficiency: If the gas cap is not sealing correctly, it can cause fuel to evaporate from the tank, reducing fuel efficiency.
  4. Difficulty Starting the Engine: A bad gas cap can also cause problems starting the engine, as the fuel system may not be adequately pressurized.
  5. Poor Engine Performance: In some cases, a bad gas cap can cause poor engine performance, such as hesitation, rough idling, or stalling.

Indicator 1: CEL Illuminates

The first and most obvious indicator of a loose fuel cap is the CEL illuminating on the dashboard. The CEL is designed to notify the driver of an issue with the vehicle that needs to be addressed. When the gas cap is loose, it causes a leak in the fuel system, which triggers the CEL. The CEL may appear as a solid light or a flashing light, depending on the severity of the issue. If the CEL is flashing, it indicates a severe problem, and the vehicle should be checked immediately.

Indicator 2: Decreased Fuel Efficiency

Another indicator of a loose gas cap is a decrease in fuel efficiency. This results in a decrease in fuel efficiency, and the driver may notice that they need to fill up the tank more frequently than usual. While this may not seem a significant issue initially, it can lead to bigger problems, such as damage to the catalytic converter.

Indicator 3: Strong Fuel Smell

A strong fuel smell is another indicator of a loose gas cap. When the gas cap is not squeezed correctly, fuel vapors escape from the tank and enter the atmosphere. The driver and passengers inside the vehicle can detect these vapors. If you notice a strong fuel smell, it is essential to address the issue immediately. In addition to causing environmental damage, fuel vapors harm human health and can cause headaches, dizziness, and nausea.

Indicator 4: Audible Hissing Sound

When the gas cap is not tightened properly, it causes a leak in the fuel system, resulting in an audible hissing sound. This sound is caused by air escaping from the fuel tank, which may be noticeable when the vehicle is idling or accelerating. If you hear an audible hissing sound, you must check the gas cap immediately and tighten it as needed.

Indicator 5: Difficulty Starting the Engine

A loose gas cap can also make it difficult to start the engine. If the motor struggles to start or takes longer than usual to turn over, it may be due to a loose gas cap. In addition to causing starting issues, a loose gas cap can also affect the engine’s overall performance.

How to Prevent a Loose Gas Cap

  • Always make sure the gas cap is tightened correctly after refueling the vehicle. The gas cap should click several times when it is drawn perfectly.
  • Check the gas cap regularly to ensure it is still in good condition and not cracked or damaged. 
  • Avoid overfilling the fuel tank. Filling the tank can cause fuel to spill, resulting in a loose gas cap.
  • Use a high-quality gas cap. Using a cheap or low-quality gas cap can lead to issues with the fuel pump.

Choose Best Engine Repair Shop For Your Truck Today!

truck repair

Conclusion

In conclusion, the Check Engine Light (CEL) is an essential alert indicator to notify vehicle owners of potential car issues. While this may seem minor, it should not be ignored as it can lead to more severe problems. Therefore, it is essential for car owners to regularly check their gas caps to ensure they are adequately secured. If the CEL comes on, car owners should take their vehicles to a mechanic to diagnose and repair them promptly. 

FAQs

  • How long until the check engine light resets after a loose gas cap?

The check engine light may reset on its own after a few drive cycles once the gas cap has been tightened, but it can take up to several days or even weeks, depending on the vehicle.

  • What happens if your gas cap is loose?

If your gas cap is loose, it can cause your vehicle to lose fuel through evaporation, decreasing your gas mileage and possibly triggering the check engine light.

  • How much does it cost to fix a loose gas cap?

Fixing a loose gas cap is a simple and inexpensive task. The cost can vary, but it typically ranges from $20 to $50, depending on the kind of gas cap and labor fees. Still for further information you can consultant professional engine repair mechanic at BS Truck Repair.

  • Can I drive with a loose gas cap?

Driving with a loose gas cap is not recommended as it can negatively impact your fuel efficiency and potentially damage your vehicle’s emissions system, leading to more costly repairs.

How to Choose the Right Truck Engine Repair Shop

truck engine repair

Truck engines are the heart and soul of the transportation industry. With a reliable engine, a truck can deliver goods to their destination. However, truck engines are complex machines that require regular maintenance and repair to keep them running efficiently. When a truck engine needs repair, finding the right engine repair shop with the right engine repair mechanic is important to ensure the job is done correctly. This article will discuss how to choose the right truck engine repair shop.

Look for a Certified Engine Repair Mechanic

The first and most important factor to consider when choosing an engine repair expert and its shop is the expertise of its mechanics. Look for a shop with certified engine repair mechanics with the proper training and education to work on truck engines. You want to ensure that the mechanics working on your truck engine are knowledgeable and experienced in your engine type.

Experience Matters

Experience matters when it comes to truck engine repair. Look for a shop that has been in business for several years and has a track record of providing high-quality repair services. Experienced engine repair shops will have seen a variety of engine problems and will know how to diagnose and fix them efficiently.

Ask for Referrals

Ask other truck drivers or trucking companies for referrals to engine repair shops they have used and recommended. Word of mouth is a powerful tool in the trucking industry, and getting recommendations from others who have had positive experiences with a particular engine repair expert shop can be very helpful.

Check Reviews Online

In addition to asking for referrals, you can also check online reviews of engine repair mechanic shops. Look for shops that have positive reviews and high ratings. Read the reviews carefully to understand the shop’s level of expertise, customer service, and overall quality of work.

Look for Specialization

Some engine repair expert shops specialize in specific types of engines or trucks. Look for a shop that specializes in the kind of engine that your vehicle has. A shop specializing in your engine type will have the necessary expertise and equipment to diagnose and repair any problems quickly and efficiently.

Check for Certifications and Licenses

Check if the engine repair shop has any certifications or licenses. A shop certified by the National Institute for Automotive Service Excellence (ASE) or other industry organizations indicates they have the necessary training and knowledge to perform high-quality truck engine repairs.

Evaluate the Shop’s Facilities and Equipment

The facilities and equipment of an engine repair expert shop can also indicate the quality of their services. Look for a shop that has clean and well-maintained facilities and modern equipment. The shop should also have the tools and equipment to efficiently diagnose and repair truck engines.

Customer Service

The level of customer service that an engine repair expert shop provides can make a big difference in your experience. Look for a shop that offers excellent customer service and is willing to communicate with you about the repairs needed for your truck engine. The shop should be transparent about its benefits, costs, and repair timelines.

Get Quotes from Multiple Shops

Before deciding on an engine repair shop, get quotes from multiple shops. Compare the selections to ensure you get a fair price for the repairs needed. However, don’t make price the only factor in your decision. You want to ensure you get high-quality repairs, even if it means paying a bit more.

Trust Your Gut

Finally, trust your gut when choosing an engine repair expert shop. If something feels off or you have doubts about the shop’s expertise or services, it’s best to look elsewhere. Choose a shop you feel comfortable with and trust to provide high-quality repairs for your truck engine.

Choose Best Engine Repair Shop For Your Truck Today!

truck repair

Conclusion

Choosing the right engine repair mechanic shop for your truck is crucial for ensuring that your truck engine runs efficiently and reliably. Look for a truck engine repair shop with certified mechanics, experience, positive reviews, specialization in your type of engine, certifications and licenses, modern facilities and equipment, excellent customer service, fair pricing, and trustworthiness. By following these tips, you can feel confident that you are choosing the right engine repair shop for your truck.

In addition to choosing the right engine repair shop, it’s important to take preventative measures to keep your truck engine in good condition. Regular maintenance and inspections can help catch potential problems early and prevent costly repairs. Finding a truck inspection expert to perform routine checks and maintenance can help ensure your engine stays in good condition and operates efficiently.

In conclusion, choosing the right truck engine repair shop is crucial for your truck engine’s long-term health and efficiency. By following the tips outlined in this article and taking preventative measures to keep your truck engine in good condition, you can ensure that your truck runs smoothly and reliably, delivering goods to their destination safely and efficiently.

4 Semi-truck AC Problems and their Causes

semi truck ac problem

Semi-trucks are the backbone of the transportation industry, and the driver’s comfort is of utmost importance. The air conditioning system of a semi-truck plays a vital role in maintaining the driver’s comfort, especially during long journeys. However, like any other mechanical system, the air conditioning system of a semi-truck is susceptible to malfunctions. 

This article will discuss four common semi-truck AC problems and their causes.

  • Blowing Hot Air

The most common AC problem in semi-trucks is blowing hot air. Several factors, such as a malfunctioning compressor, low refrigerant levels, or a clogged condenser, can cause this problem. A faulty compressor is the most common cause of hot air blowing. The compressor compresses the refrigerant and pushes it through the system. If there is a truck compressor failure, the refrigerant cannot circulate through the system, resulting in hot air.

Low refrigerant levels can also cause hot air blowing. If the refrigerant levels are low, the AC system cannot produce cold air. Refrigerant leaks are the most common reason for low refrigerant levels. A clogged condenser can also cause hot air to blow. The condenser is responsible for removing heat from the refrigerant. If the condenser is clogged with debris, it will not be able to remove heat from the refrigerant, resulting in hot air blowing.

  • Weak Airflow

Another common problem with semi-truck AC systems is weak airflow. A clogged air filter, a malfunctioning blower motor, or a faulty AC fan often cause this problem. The air filter filters dust and debris from the air before it enters the AC system. If the air filter is clogged, it will reduce the airflow, resulting in weak airflow.

A malfunctioning blower motor can also cause weak airflow. The blower motor pushes the air through the AC system and into the cabin. If the blower motor is not working correctly, it cannot push enough air into the cabin, resulting in weak airflow.

A faulty AC fan can also cause weak airflow. The AC fan pulls air through the condenser and removes heat from the refrigerant. If the AC fan is not working correctly, it will not be able to pull enough air through the condenser, resulting in weak airflow.

  • Unusual Noises

Unusual noises are another common problem with semi-truck AC systems. Several factors, such as a worn-out compressor, a faulty blower motor, or a loose belt, can cause these noises. A worn-out compressor can produce unusual noises, such as grinding or squealing. These noises are often an indication that the compressor is about to fail.

A faulty blower motor can also produce unusual noises, such as rattling or whining sounds. These noises are often an indication that the blower motor is not working correctly and may need to be replaced.

A loose belt can also produce unusual noises, such as squeaking or chirping sounds. A loose belt can cause the AC system to work harder, resulting in unusual noises. If the belt is not tightened, it may break, causing further damage to the AC system.

  • Foul Odors

Foul odors are another common problem with semi-truck AC systems. These odors can be caused by several factors, such as a dirty air filter, mold or mildew growth, or a clogged evaporator drain. A dirty air filter can produce foul odors, as it traps dust and debris, which can accumulate and produce unpleasant smells.

Mold or mildew growth is another common cause of foul odors. The AC system provides a perfect environment for mold or mildew growth, as it is dark, damp, and provides the necessary nutrients for their growth. If mold or mildew growth is present, it can produce a musty odor.

A clogged evaporator drain can also cause foul odors. The evaporator drain is responsible for draining the moisture that is removed from the air during the cooling process. If the drain is clogged, the moisture can accumulate and produce foul odors.

Preventing Semi-Truck AC Problems

Prevention is always better than cure, and this applies to semi-truck AC problems as well. Regular maintenance can help prevent AC problems and prolong the life of the AC system. 

Here are some tips to prevent semi-truck AC issues:

  • Change the air filter regularly. A dirty air filter can reduce airflow and produce foul odors.
  • Check the refrigerant levels regularly. Low refrigerant levels can cause hot air blowing.
  • Keep the condenser clean. A clogged condenser can cause hot air blowing.
  • Inspect the compressor, blower motor, and AC fan regularly. Worn-out or faulty components can cause unusual noises and weak airflow.

Choose Best Truck Repair Shop For Your Truck Today!

truck repair

Final Words!

Semi-truck AC problems can be frustrating and costly. However, by understanding the common problems and their causes, you can take the necessary steps to prevent them. Regular maintenance is key to preventing AC problems and prolonging the life of the AC and truck electrical system. By following the tips mentioned in this article, you can keep your semi-truck AC system running smoothly and avoid costly repairs.

Get a Free Quote